So you know about our counters, now let me tell you about our backsplash. I debated on whether or not to just include both in the same post, but doing the back splash was kind of an adventure, so I decided that it was deserving of its own!
First things first….here it is finished!
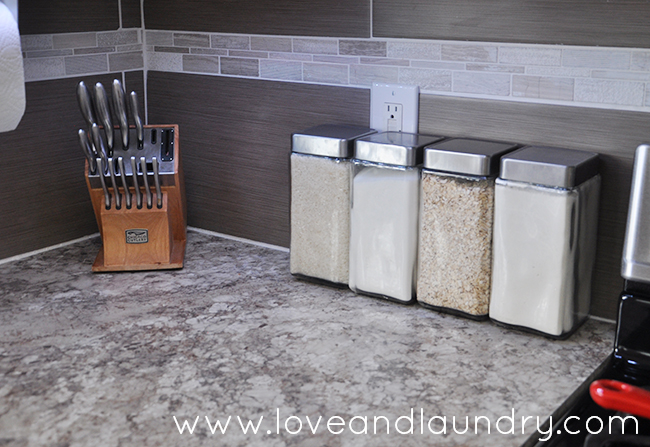
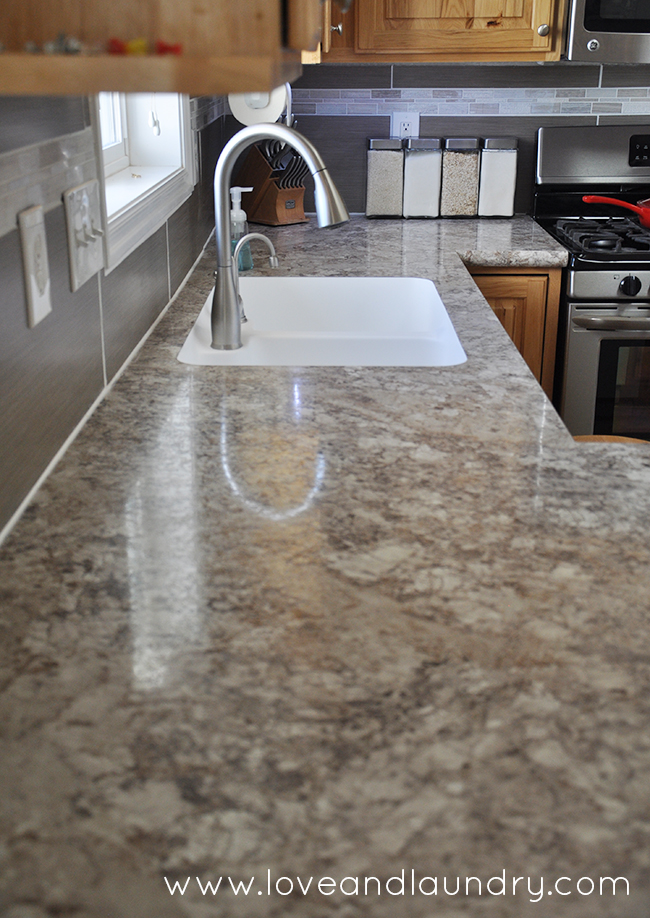
I really love how it turned out! I wanted something simple that wouldn’t pull attention away from our counter tops. But I also wanted it to be beautiful.
When we put in the tile backsplash in our old kitchen (not really old, but pre- new counter tops), we used an epoxy pre-mixed grout. It is awesome for wet areas. The epoxy mixed in almost makes the grout a sandy plastic. If that even makes sense. It’s still has the texture of grout, but with clear plastic mixed in. It’s completely sealed when it’s done which means that it’s waterproof. But, holy moly is it permanent! Once that stuff goes on there, it is there for good!
In order to get it off, we actually had to remove that part of the wall.
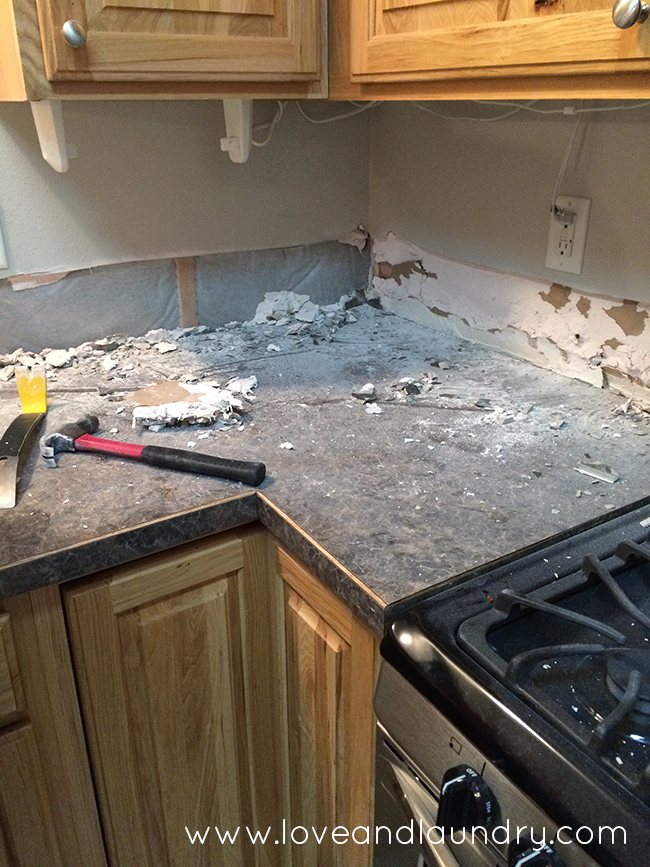
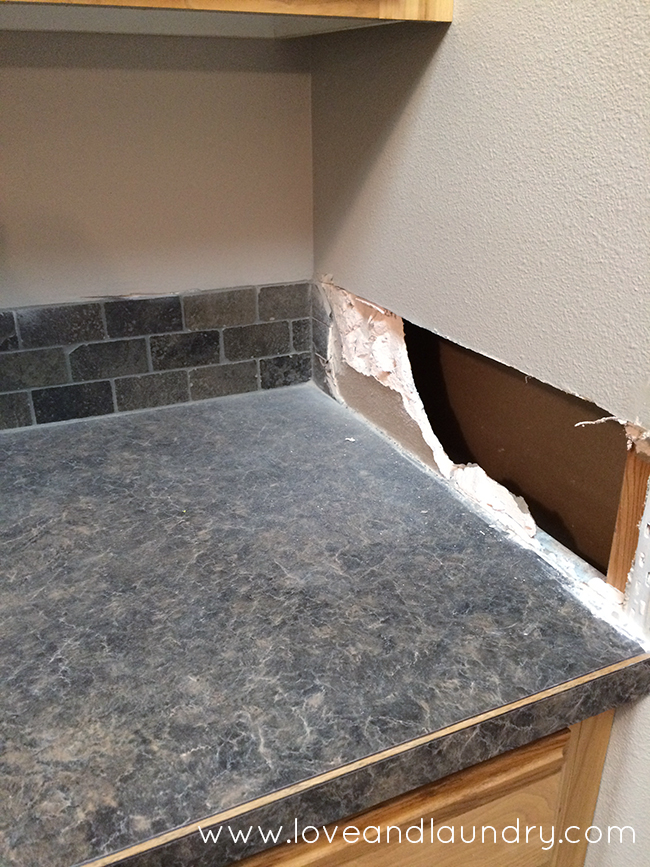
I’m not going to lie…it was kind of a messy process.
Dave is super busy and we kept trying to coordinate a time that we could go down to Home Depot together to find a tile we loved for our new backsplash. We could not find a time that worked for both of us, so we talked about what we both were looking for. I knew wanted the new backsplash to go all the way up to the bottom of the cabinets so we needed a lot. But I definitely didn’t want it to be expensive. We wanted it to be a grayish color to match both our house and our counters. On a previous visit to Home Depot, I admired all the wood tile options that they have and I wondered if that might make a good backsplash. After our conversation, we agreed that a grayish wood tile was perfect and I went down to Home Depot to buy it myself. I texted Dave pictures of different tiles with our counter top sample and between the two of us, we found a good wood tile that we loved.
Except that I started to question if wood tile would be a good idea. I absolutely had to get the tile that day, so in Home Depot, I did a quick google search on my phone of wood tile backsplash images. Do you know what I found? Absolutely nothing. Not one image of a wood tile backsplash anywhere. So, I don’t even know if it’s a thing. At least not on the internet.
I decided to commit anyway. We both had agreed and we needed to get the tile so we could put our kitchen back together. On the way to the register, I thought…well, we’re either being way ahead of trend or this is going to be a huge mistake putting wood tile against our wood cabinets (especially because they are different wood).
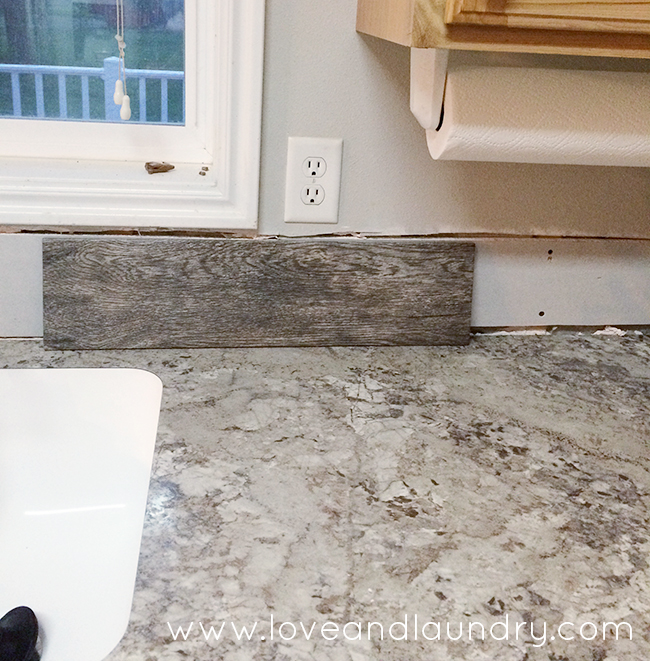
When I got home, I set the wood tile against the wall to test it out and I thought, okay…I can live with this! It matches the counters really well and I think I’ll love it! It might be a little different than a traditional backsplash, but I was on board.
The next morning I got up and Dave was getting ready to start installing it. And I jokingly told him about what I wondered walking to the register the night before. That’s all it took. Apparently he was a little on the fence too and as soon as I said “I wonder if putting a wood tile with wood cabinets will be too much wood?” he decided that it was definitely the wrong choice. Eventually I would love to put that same wood tile in as our kitchen floors. One project at a time.
So, we headed back down to Home Depot together. We had already rented the tile saw for the day (it had to be back by 5) and we were supposed to go out-of-town that afternoon. We were already pushing our limited time and an extra trip to Home Depot put us behind. Going to Home Depot for us is a bit of a trip. It’s in the next town and is 25 minutes away. We decided that it was worth it as long as we had something that we would love. This was a permanent change, after all!
We actually spent quite a long time trying to decide, but eventually settled on some over-sized tiles that were 12X24 with smaller tiles as the accent.
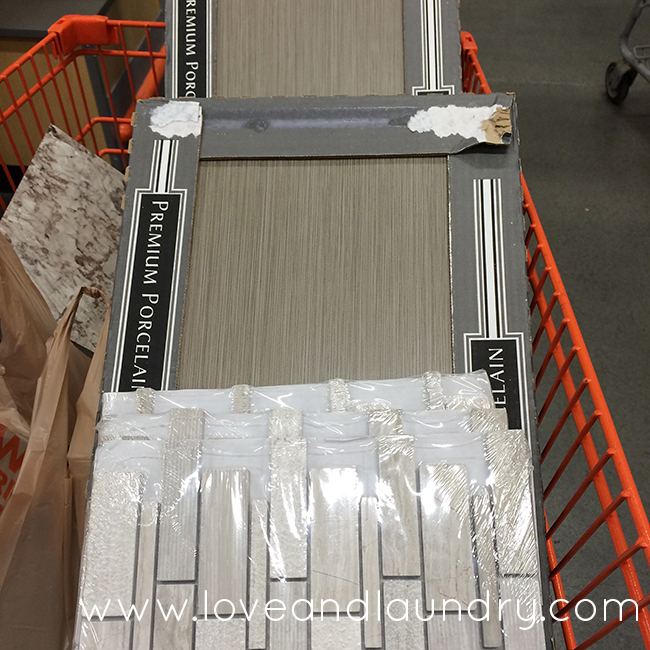
We rushed home as fast as possible (we were into the early afternoon now).
To make things easier to install, we had already decided to use Simple Mat. I blogged about it before when we did our bathroom tile. It’s a really sticky mat that goes directly on the wall and you can just stick tile straight to it. When I say really sticky, I mean it! You have to be pretty committed when you stick a tile to it. It’s hard to get it back off if you need to adjust the tile placement. Using the Simple Mat also makes it faster because you don’t have to wait for the thinset to dry. You can put the tile in and then start to grout immediately. Our plan was to get it all up and grouted before we had to have the tile saw back.
The only problem with the Simple Mat is that is not really designed for over-sized tile because they’re so heavy. Of course we didn’t know that because we’ve never used oversized tile before. As we were putting the tiles up, they were very slowly sagging down. So instead of a nice space between each one, there was really no room left. It was kind of a disaster. It took some creativity, but we finally got it figured out. Not without a few tears of frustration on my part. Okay…not really tears, but I was worried for sure!
Long story short, if you’re going to do an oversized tile backsplash, just do it the good old-fashioned way with thinset! Haha!
It really did turn out beautiful, though! I love the subtle texture in the tile and the accent we chose. I also love how well the color goes with both our counter tops and the rest of our house (like the paint colors and carpet).
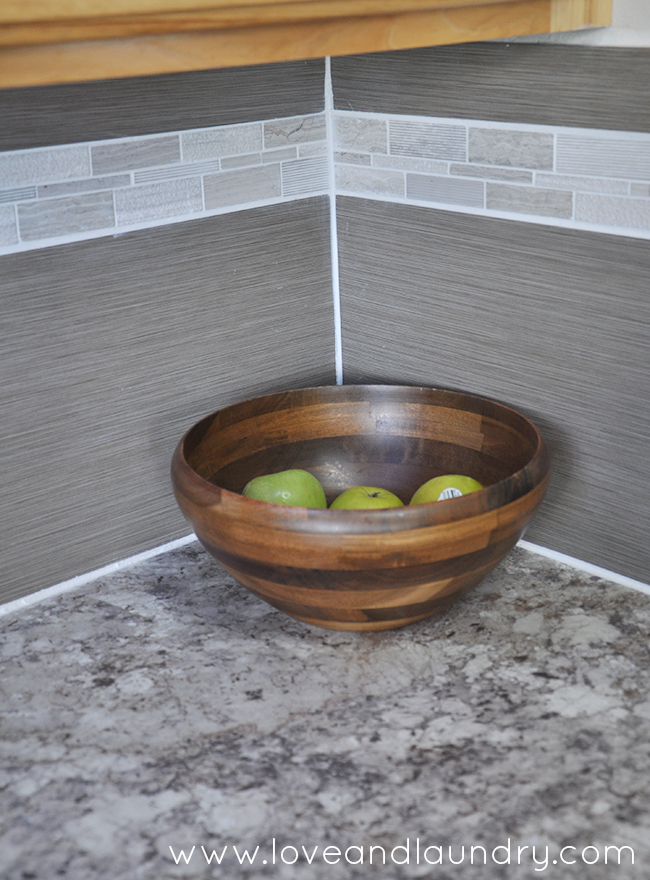
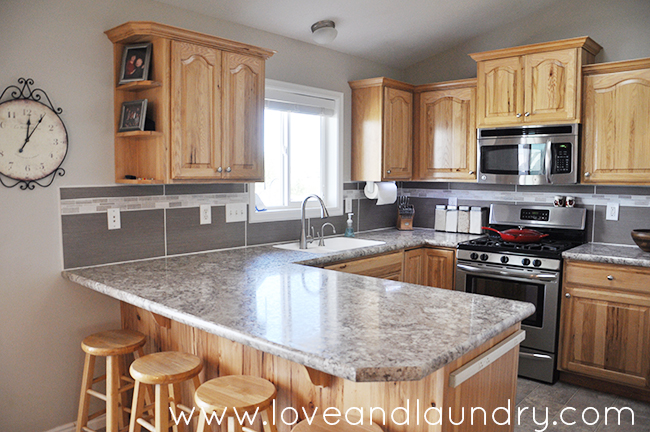
And when it was all said and done, I’m grateful that we decided to stay away from the wood tile. I’m sure I would have loved it, but I love what we ended up using even more! Oh…if you’re wondering if we made it back to the rental store with the tile saw by 5? Just barely!